Social affairs

One thing that I am starting to realise and discover (and love!) is the gigantic quilting community. Despite what you might think, quilting is very social. Being alone in front of a sewing machine doesn’t sound that social, isn’t it? That’s what I first thought but soon realised how wrong I was. Let me explain some of the organisations and structures I recently came across.

Quilters guild: This is an event where participants gather to share their experience and expertise. I went to the one in Wellington that has more than 100 members. I particularly enjoyed the “show and tell” session where participants bring their latest finished quilts and tell the story behind it.

I also heard of “Quilting Bees”, where a small group of people will gather to realise a particular quilt. “Quilting retreats” is also very popular: a group of people will gather for a period of time to work on their personal projects. It must be great not to have any distraction from the outside world and talk sewing with your peers.

This is only the tip of the iceberg and relate to face to face interactions. I like how all these traditional structures transferred onto the on-line world, and doing so well. I absolutely love using Instagram to share my projects and watch other’s. I love how easy it is to discover quilters and be inspired by their work. Two of my recent quilts where actually made after seeing someone’s else progress on Instagram.

Since starting this blog, I have decided to take a more active approach to the community. First, I joined a Blog Hop organised by Plum and June. The aim is to meet new bloggers and share some blogging and quilting tips.

Blog hopOn this group, we formed a “Round Robin” of people living in Australia and New-Zealand. I wasn’t familiar with Round Robin at first (I actually thought it was a “Round Bobbin”, it would make sense, no?) but I loved the concept and jumped in. Basically, Round Robin quilting is a small group of people. Each participant will realise a quilt block, then send it to the next person who adds a border, then send it to the next person and so on. This means, simultaneous quilts are made in the same time. Once everyone has worked on each quilt, it goes back to the one who made the centre block. It is hers to keep. Sounds fun, doesn’t it?

We are called “Magic Possum”

Possum magicIn this group, you will find:

I’m equally excited and scared. The group is formed with very talented women and the pressure is now on.

Soft toys

I enjoy making quilts of course, but I also like playing with fabric to create little soft toys. I particularly like making them for baby gifts. Let me share two of my recent projects: a patchwork boat for a little boy and an embroidery portrait for a little girl:IMG_5981I didn’t use a specific pattern for the boat, just making it up as I went. For the little girl, I copied an existing embroidery. Unfortunately, I didn’t keep the source, if you recognise it, let me know and I will add it.

I think I like them equally, I find them very cute. I also embroidered the baby’s name on the back of each soft toys. Shame I don’t have more pictures. I quickly snap a picture just before going to the post office to send them away. While making them, I had so many more ideas and I can’t wait to do more and more.

Linking up at:

Show and tell Tuesdayfabrictuesday

Half Square Triangles love

Today, I would like to invite you to a walk down memory lane. This would be a short walk as this is the story of my quilt #2 that I realised when I was living in London in 2012.

At that time, I was an avid reader of lifestyle blogs and started noticing quilts that I really like around the blogosphere. One of my friends was getting married and I thought I would make her a quilt as a present.

I register to Craftsy and enrol on to the free BOM course with Amy Gibson. I loved her course. She was so sweet, explained each block so well (easy to follow for a beginner) and you could even ask questions and share your projects with the other students. I thought the video system was brilliant, I would just put my iPad on my desk, next to my sewing machine and follow Amy in “real” time. 

I started around Easter time, and was influenced by Easter colours to pick my fabric:

P1220471

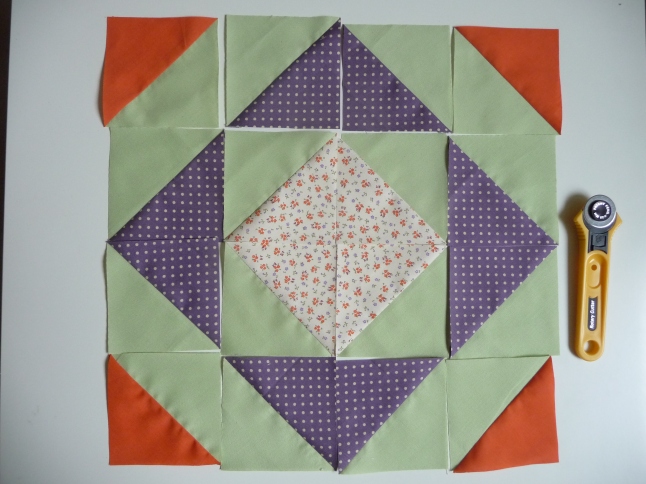
I came across the Half Square Triangle lesson on Amy’s BOM and I loved it. There are so many possibilities, so many designs from this simple and fun technique. I stopped working on the BOM, and just experienced more and more with HST.

P1220490P1220491P1220745P1220478

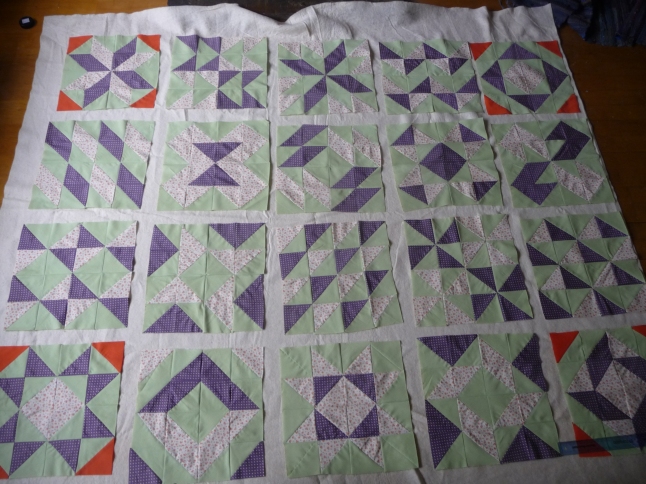
After several weeks, I had enough blocks to make a decent size quilt.

P1220757

I decided on adding orange borders to make everything “pop”. It was a bold choice, I was planing on adding white borders first, but I am glad I went for the bolder version.

P1220795

So far, so good. When it came to the actual quilting, I was very scared and had no idea of what I was supposed to do. I put it off for a very long time. Then it was nearly time to go to the wedding, so I had to continue. I bought a glue spray and quilted my quilt sandwich (no basting, I didn’t know what it was at that time). As you can imagine, it went very wrong. I didn’t have a walking foot (and still don’t have), the fabric made so many puckering, I didn’t manage to sew a single straight line. It was horrible.

After several quilts, I’m still nervous to quilt, it is definitely an area where I should improve. It was so bad that I actually wonder if I should offer it or not at my friend’s wedding. I looked for other options but finally decided that I will still make it as a present despite all the horrible quilting mistakes.

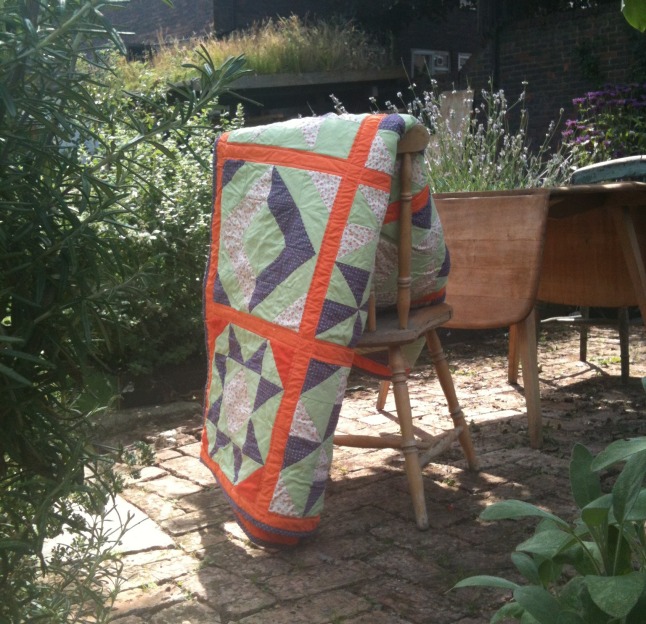
I only took pictures from a far in our communal gardening plot, so you can’t really see the details.IMG_5796xxIMG_5804cc

We went to the wedding, it was splendid and my friend seems happy about her gift.

Recently, I was wondering whether or not she was using the quilt. And this week, I receive this very cute picture of her daughter:Amelie and quilt

She says she uses the quilt a lot indoor for her daughter as a play mat. I couldn’t be happier.

PS: I can not resist sharing some “behind the scene” pictures:PicMonkey Collage

Participation of my husband (boyfriend at that time) on some block designs, while watching surfing videos. Another apparition of THE boyfriend while spraying glue. Plus, my “stress face” while sewing binding.

I still love making HST and can’t wait making another quilt with them!

Linking up with TGIFF, Crazy Mom Quilts and Link a Finish Friday.
Finished FridaylinkButton_Friday2_Resized

Irish chain (WIP)

After sewing my “Tiles” quilt top, I was inspired to do more Irish chain blocks. I recently received a bag full of scraps and found couple of stripes with a countryside theme. I thought it would be perfect for an Irish chain quilt.

IMG_6682

This time, I followed a tutorial. I like this video from MissouriQuiltCo, it is very well explained. The pressing is key here. As a reminder: press towards the darker colours. It will help to nest seams properly later on. And I must say, it worked like magic.

IMG_6723

I really like discovering about short-cuts like sewing stripes to add 3 squares together. In no time, all my 9 patch blocks were assembled.

IMG_6729

I alternate a solid block with this Irish chain block, and here is the top:

IMG_7208

My plan was to made it quilted with a wood grain stitch. However, my long arm quilter doesn’t have this stitch, so I’m still looking for options.

Linking this top to Link Tuesday and WIP Wednesday

TuesdayWIP Wed

Dear Goldie (my first flying geese)

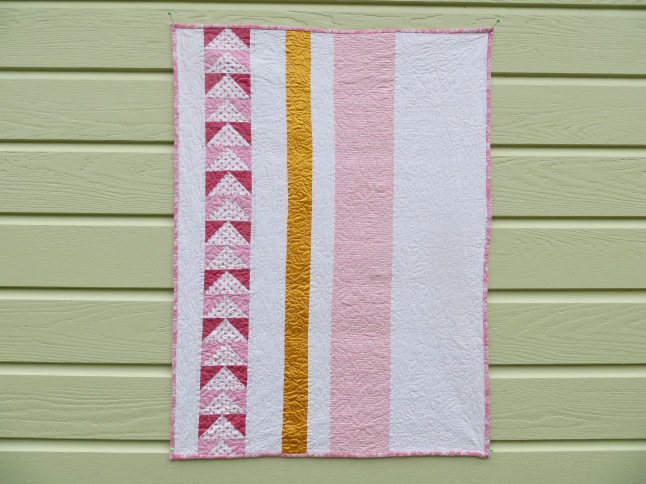
I haven’t quilt for long but what I was obsessed about (and still is) is Half square triangles. This is the first quilting technique I learnt and I think they are so great, you can do so many designs with them. All my quilts were based on HST, but this year, my quilting goal was to spread my wings and learn new blocks and new sewing techniques. I was thinking of flying geese for a while, I like them, but maybe not in an entire quilt. An idea started to form in my head: flying geese stripe, polka dot, pink and some gold.

I chose two different shades of solid pink and a polka dot pink for the flying geese. I only did one strip and I love how they turned out.

IMG_7090

What I had in mind was a very simple quilt design with stripes: one flying geese stripe, one gold stripe and one solid pink stripe, alternating with white. I like minimalist look and this idea was perfect.

Once the top done, I gave it to my favourite long arm quilter and chose a floral design. It just brings everything together and doesn’t look so plain anymore, I love it.

IMG_6936

The backing fabric is very special to me. It comes from my husband’s grandma. I had the chance to know her and spend some time with her. She was a talented seamstress and I even stayed one week at her place with all the ladies (sister-in-law, cousins-in-law) to learn how to sew. She helped me sewing a summer dress. I loved that week and will cherish it for a very long time. When she passed away, we decided to share her fabric stash. The backing is one of her fabric, I’m sure she would love seeing it being transformed as a quilt.

IMG_7088

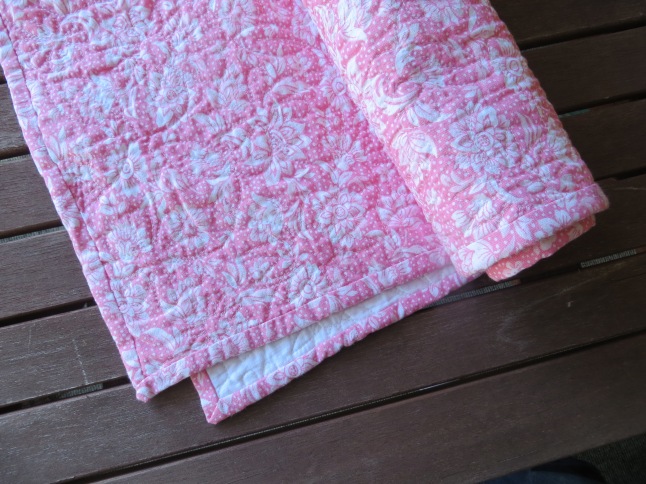
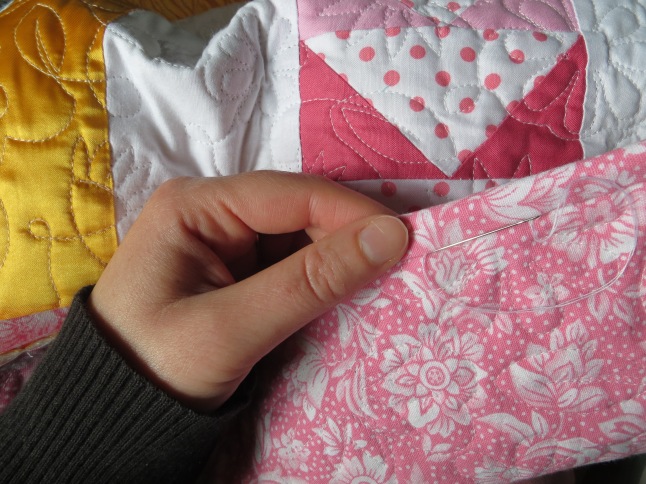
I wasn’t too sure what type of fabric to use for the binding. When I asked around, someone suggested to use the same as the backing fabric. Brilliant! I don’t often think of this option but it is very valuable and help making a homogeneous result.

IMG_6948

I love this quilt and the vintage feel attached to it: maybe it’s the wrinkles, maybe it’s the vintage look from the back fabric, I don’t know but I love it! This quilt does look very girly with all these pinks and flowers, I’m not ashamed to be a girly-girl and I can picture this quilt in a little princess bedroom.

IMG_7135


Quilt Details
Finished size: approx 28′ x 38′
Fabric: Solid pink cotton, pink polka dot cotton and gold satin
Backing & Binding: Vintage floral 
Pieced by: Me
Quilted by: Professional Long arm quilter


Linking this quilt to TGIFFFinish it up Friday:

Finished FridaylinkBQS May 2014